Deploy a Command-Line Tool on Seven Bridges
Introduction
Seven Bridges (SB) offers a platform for building and running a wide range of tools and workflows. While the official documentation provides a tutorial on creating tools, this case study goes further by focusing on a real-world example specific to the AIMPF.
We will create a tool that wraps Python code into a command-line tool. This tool will take experiment names as input, query the db38 database, retrieve records, and generate a directory containing individual Excel files for each experiment.
To build this tool, we need a Command-Line Interface (CLI) for the Python code. If you are unfamiliar with CLI, you can learn more in the following tutorial: Build Command Line Interface for Python code. Once the CLI is ready, we can proceed to build the tool on SB.
Build the Tool
Create the Tool
To create a tool on SB, follow these steps (adapted from the official documentation):
Select your division
AIMPFand navigate to your projectsandbox-chen(or your own project).Click the
Appstab.Click
Create appin the top-right corner to open the app creation dialog.Select
Command Line Tool.In the
Namefield, enterdb38pullingfor your tool.Select the CWL Version to use. The latest recommended CWL version is selected by default.
Click
Create. You will be taken to the tool editor to start entering the tool information in the sections described below.
Register the Docker Image

In the DOCKER IMAGE section, register the Docker image containing the Python code for the tool: images.sbgenomics.com/contextualize/db38pulling:0.1.1. For more details about Docker image formats, refer to the official documentation.
Set the Arguments and Input Ports
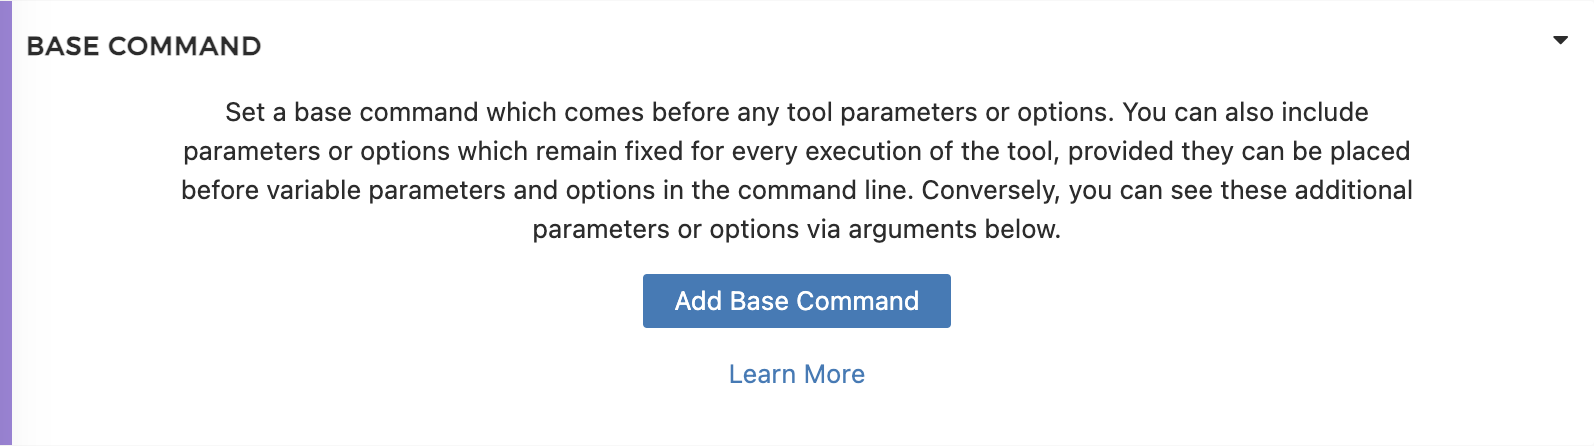
The BASE COMMAND is not required for this tool, so you can leave it empty.
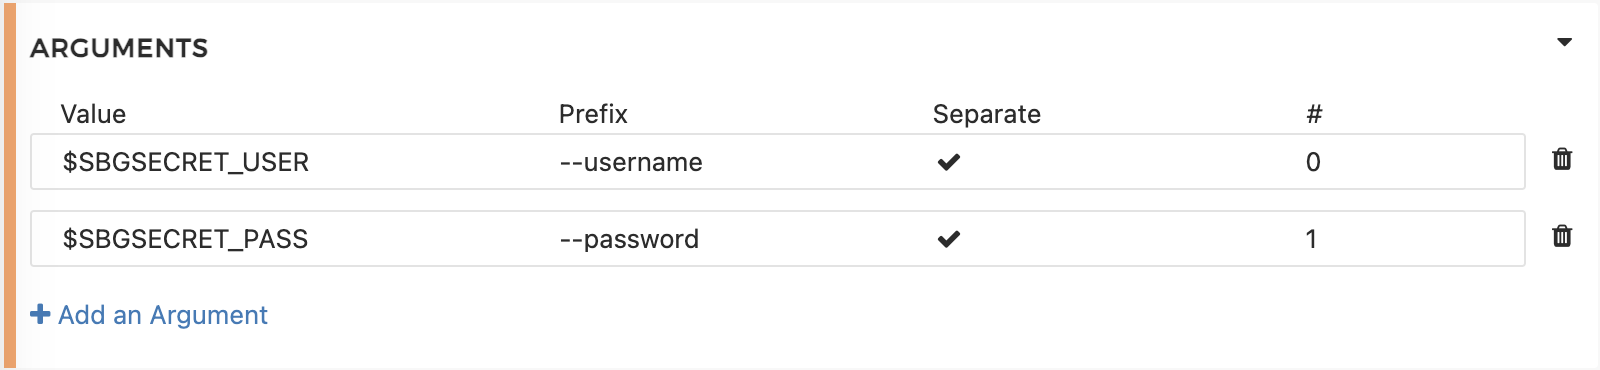
In the ARGUMENTS section, define two arguments: SBGSECRET_USER for the username and SBGSECRET_PASS for the password. These are used to authenticate the user Contextualize to query the db38 database.
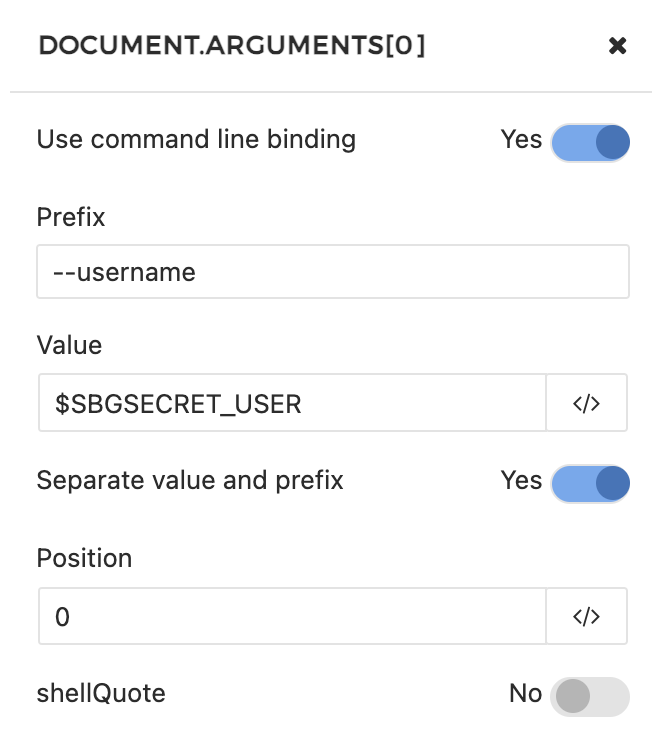
For SBGSECRET_USER, enable Use command line binding, set Prefix to --username, and set Value to SBGSECRET_USER. Enable Separate value and prefix and set Position to 0 (optional in this case). Apply similar settings for SBGSECRET_PASS.
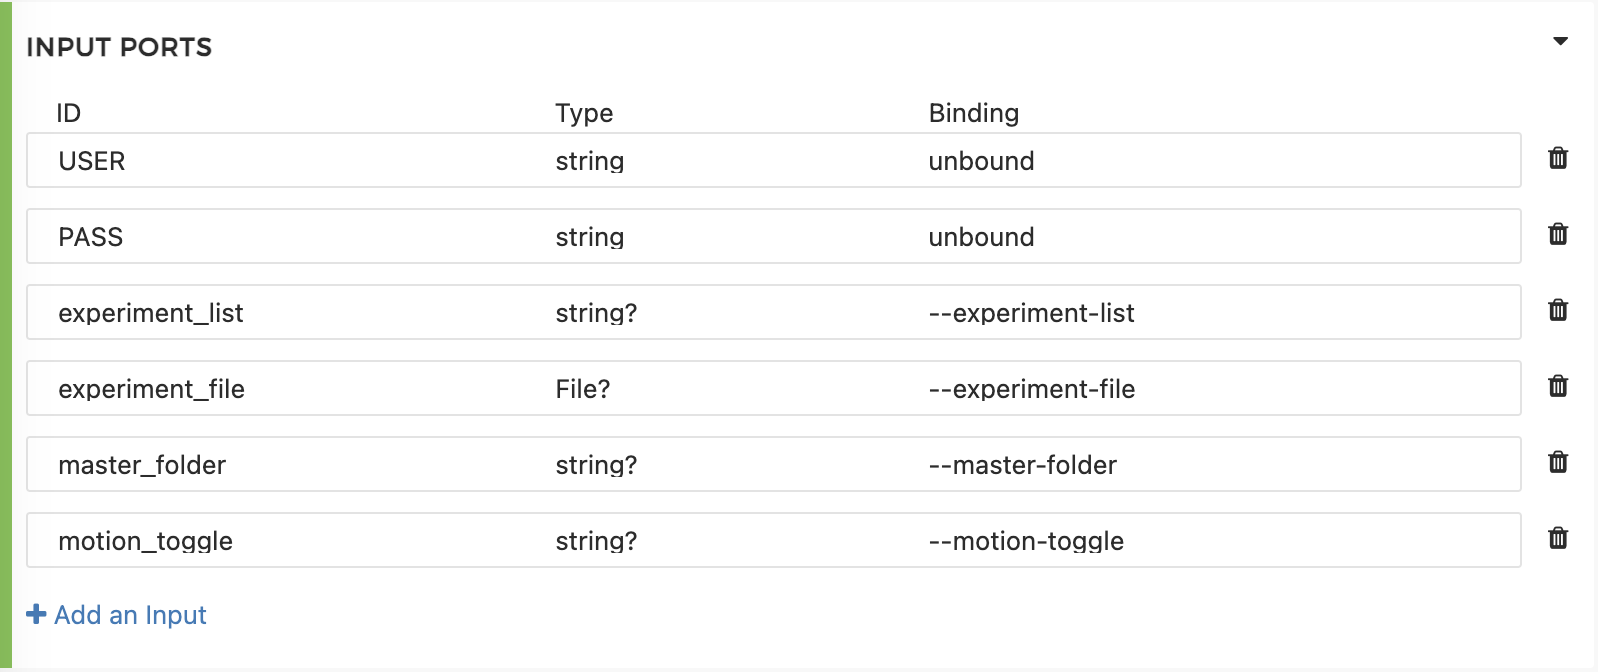
In the INPUT PORTS section, define the input ports for the tool: USER, PASS, experiment_list, experiment_file, master_folder, and motion_toggle. All are of type string except for experiment_file, which is a file type.

In the OUTPUT PORTS section, define the output ports for the tool. The output port output_folder is of type directory. The output folder name will be determined by the master_folder input port, with the Glob value set to $(inputs.master_folder).
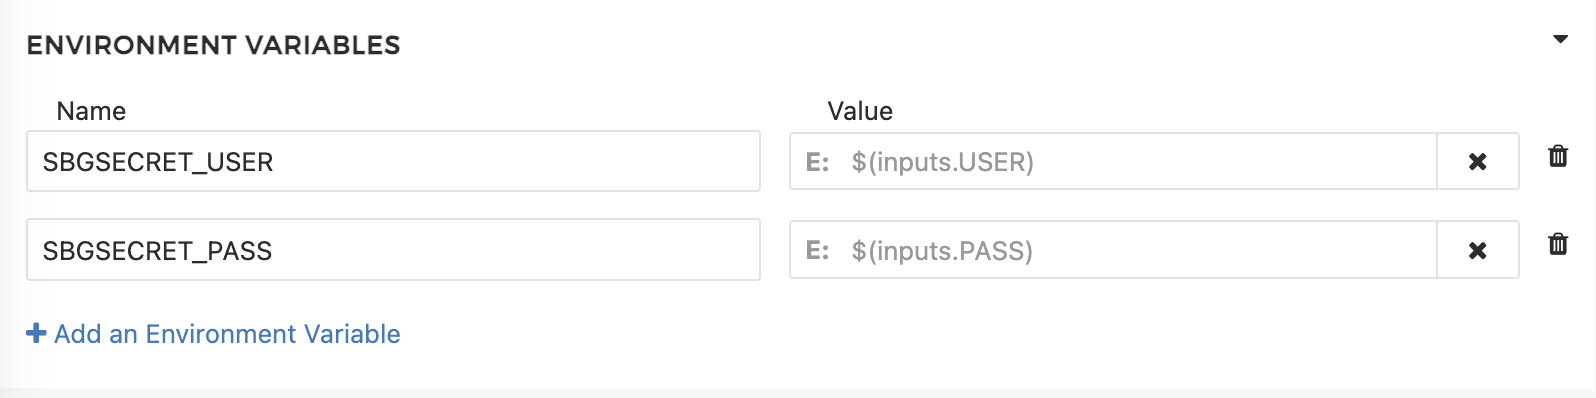
In the ENVIRONMENT VARIABLES section, set the environmental variables SBGSECRET_USER and SBGSECRET_PASS to authenticate the user for querying the db38 database.

After setting up the tool, the system will automatically generate a command, visible in the COMMAND section.
Note that secrets must be specified in the ARGUMENTS, INPUT PORTS, and ENVIRONMENT VARIABLES sections.
Update the Tool
You can update the tool by following these methods:
Click the
Appstab, finddb38pulling, click the...next to the tool name, and selectEdit.Click the
Appstab, finddb38pulling, click its name, then click theEditbutton in the top-right corner.If there is any run history in the dashboard, click the event, then click the app name on the left side of the screen. On the next page, click the
Editbutton in the top-right corner.
Updating the tool is similar to creating it. You can update the Docker image, arguments, input/output ports, environmental variables, and command. After updating, click the Save button in the top-right corner to save changes.
Tip
After updating, the revision number will increment by 1. When using the tool later, you can select the appropriate revision. Additionally, adjust the secret whitelist to grant the new revision access to secrets.
Use the Tool
Configure the Secret
To securely store and use sensitive information like usernames and passwords in the tool, follow these steps:
In the top menu, click
Developerand selectSecrets management.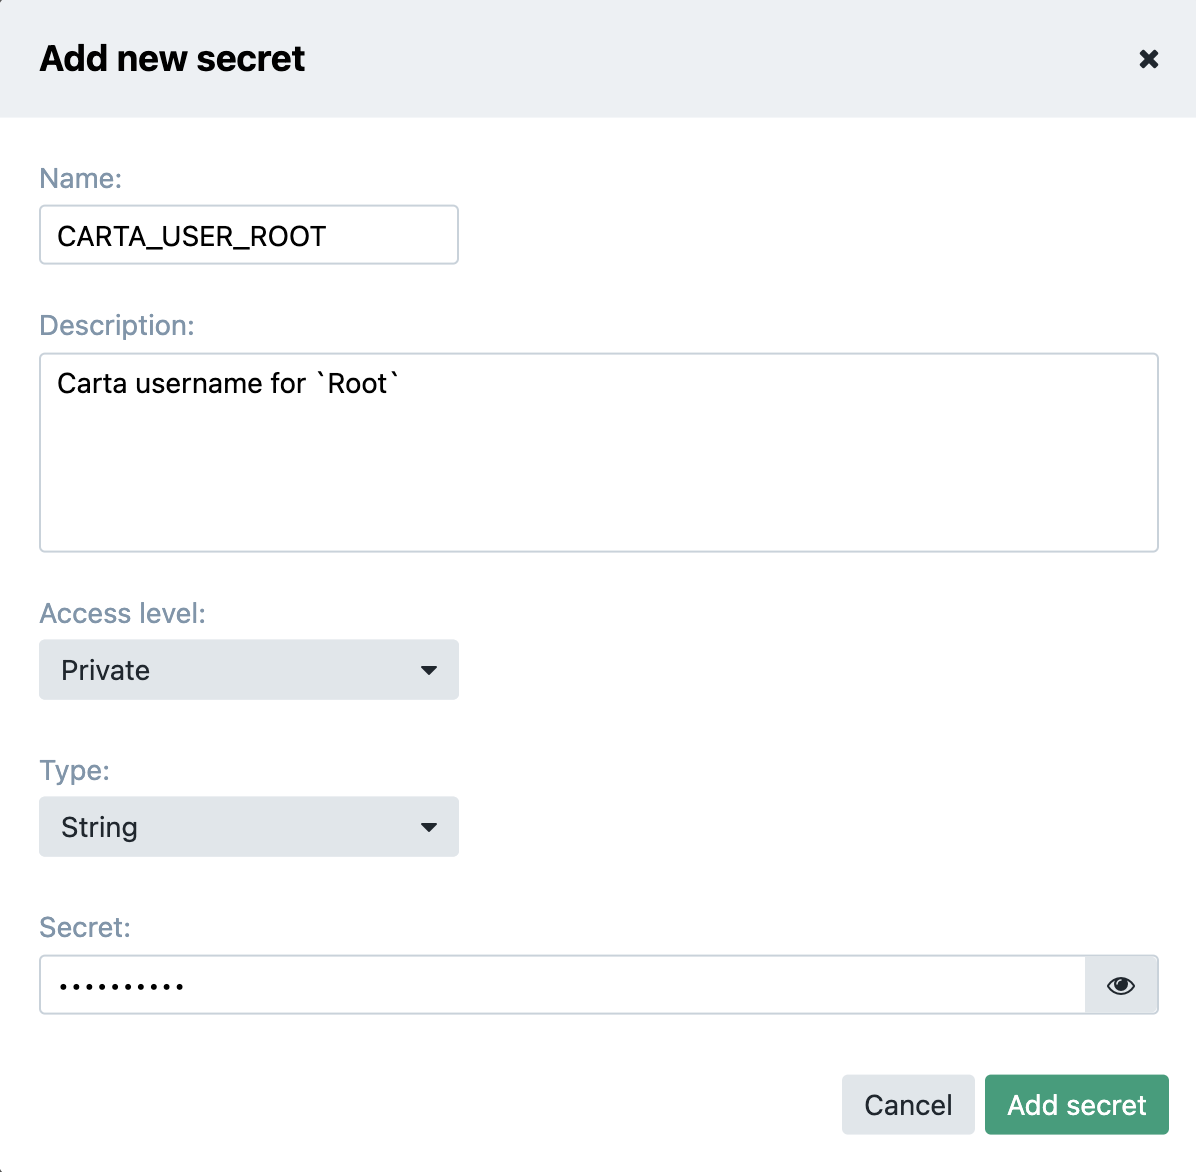
Click
Add new secretand enter the secret name, value, and a short description. Secrets can be shared within the same division. Once done, clickAdd secret.To edit an existing secret, click the pencil icon next to the secret name. To delete a secret, click
...and selectDelete secret.
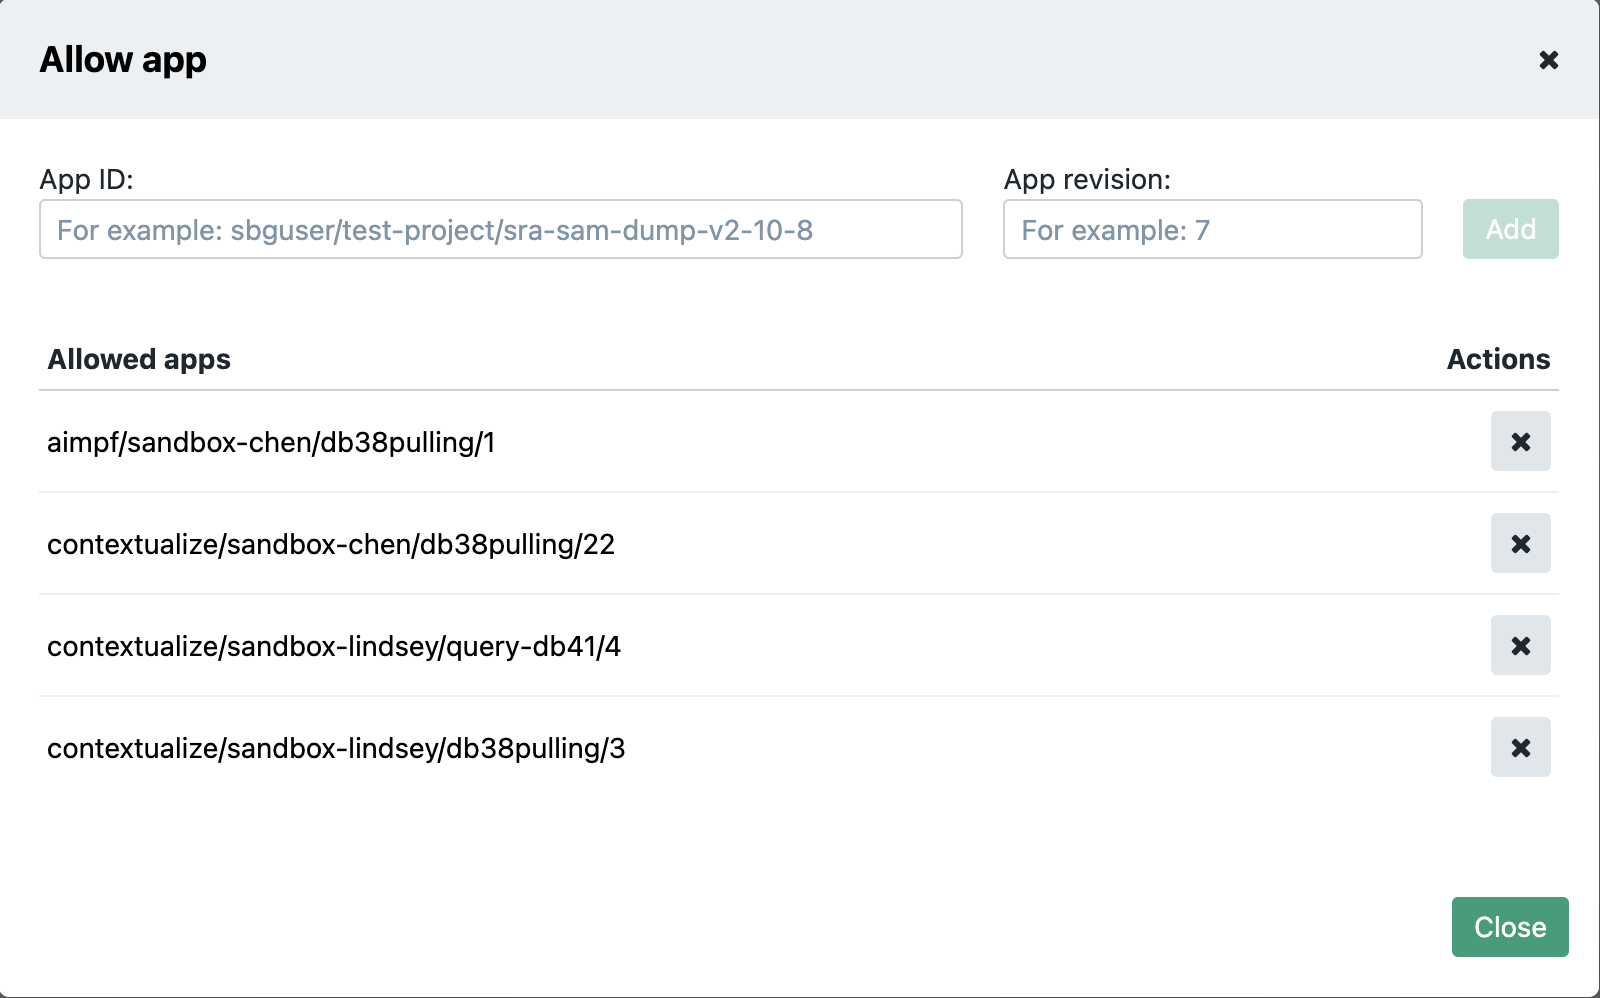
To allow apps to access the secret, add it to the secret whitelist. Click
...next to the secret name, selectAllow app, enter theApp IDandApp revisionin the pop-up window, and clickAdd.
Tip
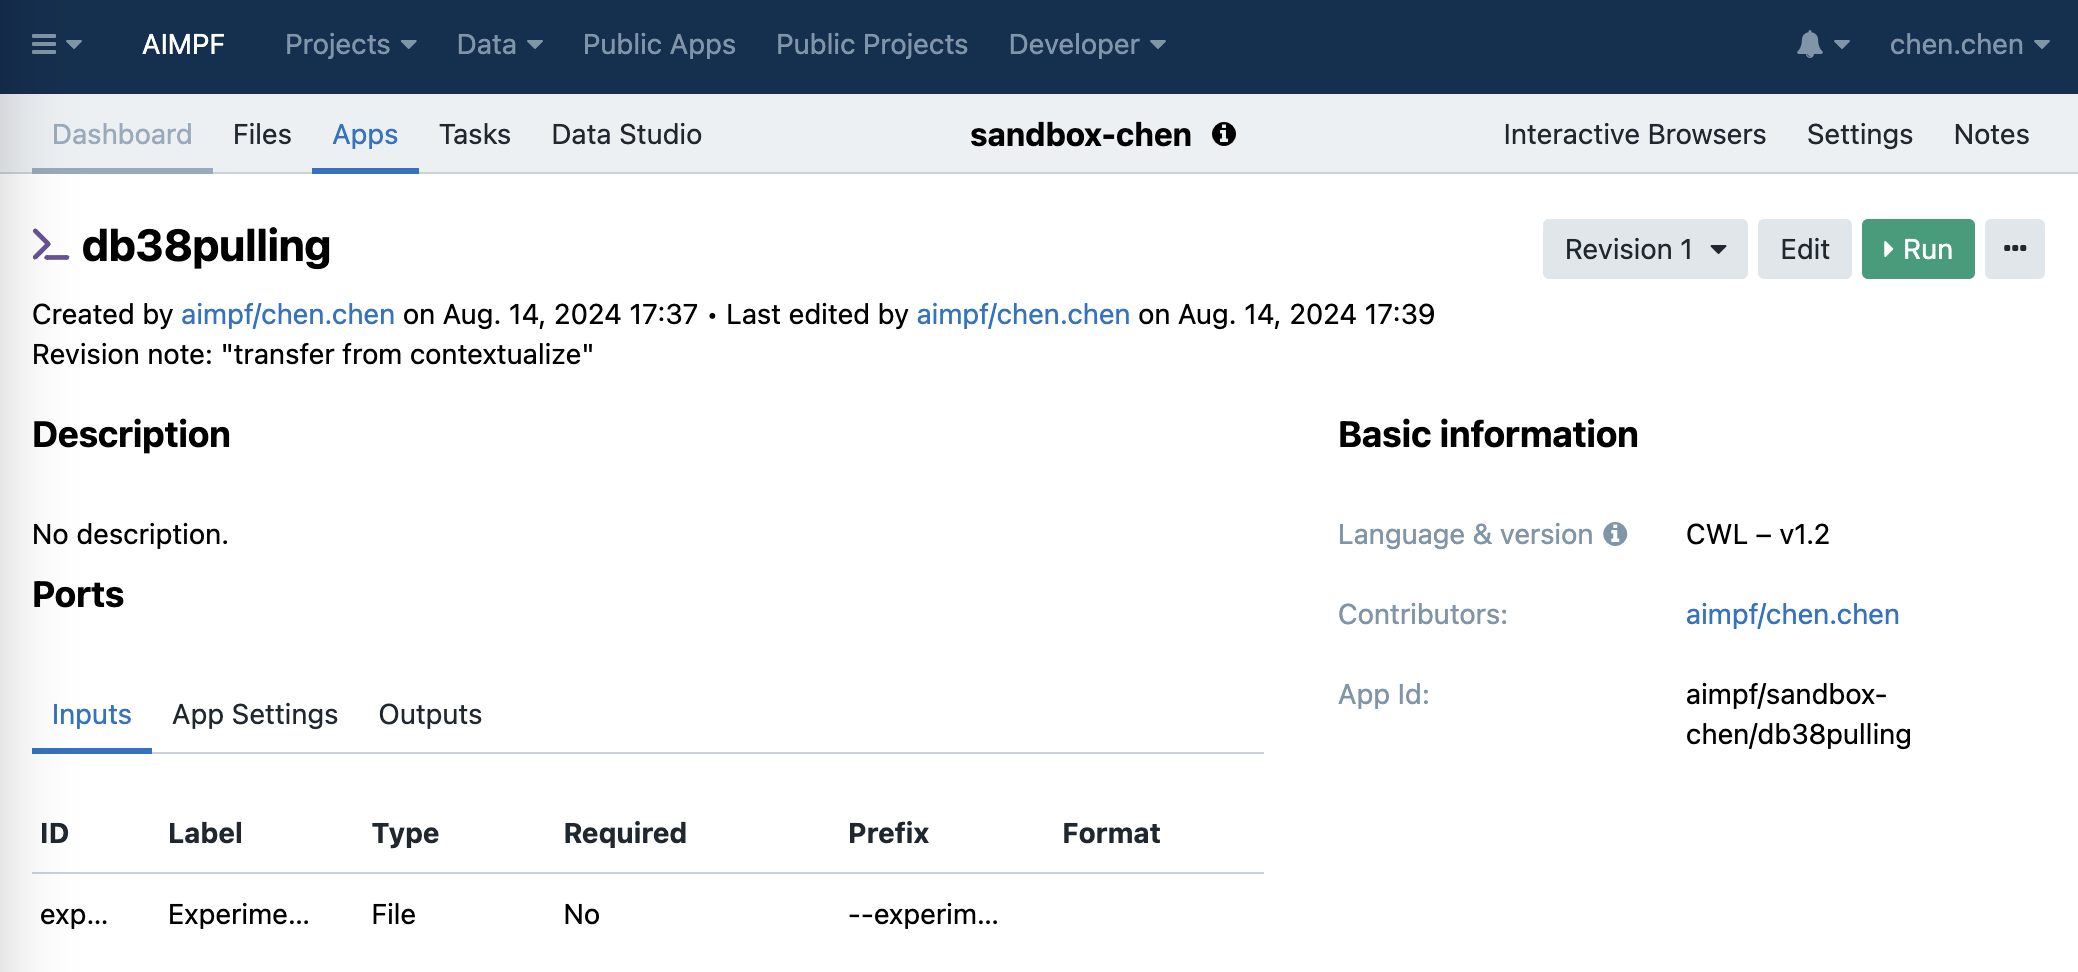
The App ID and App revision can be found on the tool’s main information page, typically formatted as <division>/<project>/<app>/<revision>.
Note
Secrets are shared across the division, so you don’t need to create the same secret multiple times. Secrets can also be shared with others, configurable in the secret settings.
Run the Tool
To run the tool, follow these steps:
Select your division
AIMPFand navigate to your projectsandbox-chen(or your own project).Click the
Appstab.Find
db38pullingand clickRunto open theTaskstab for configuration.
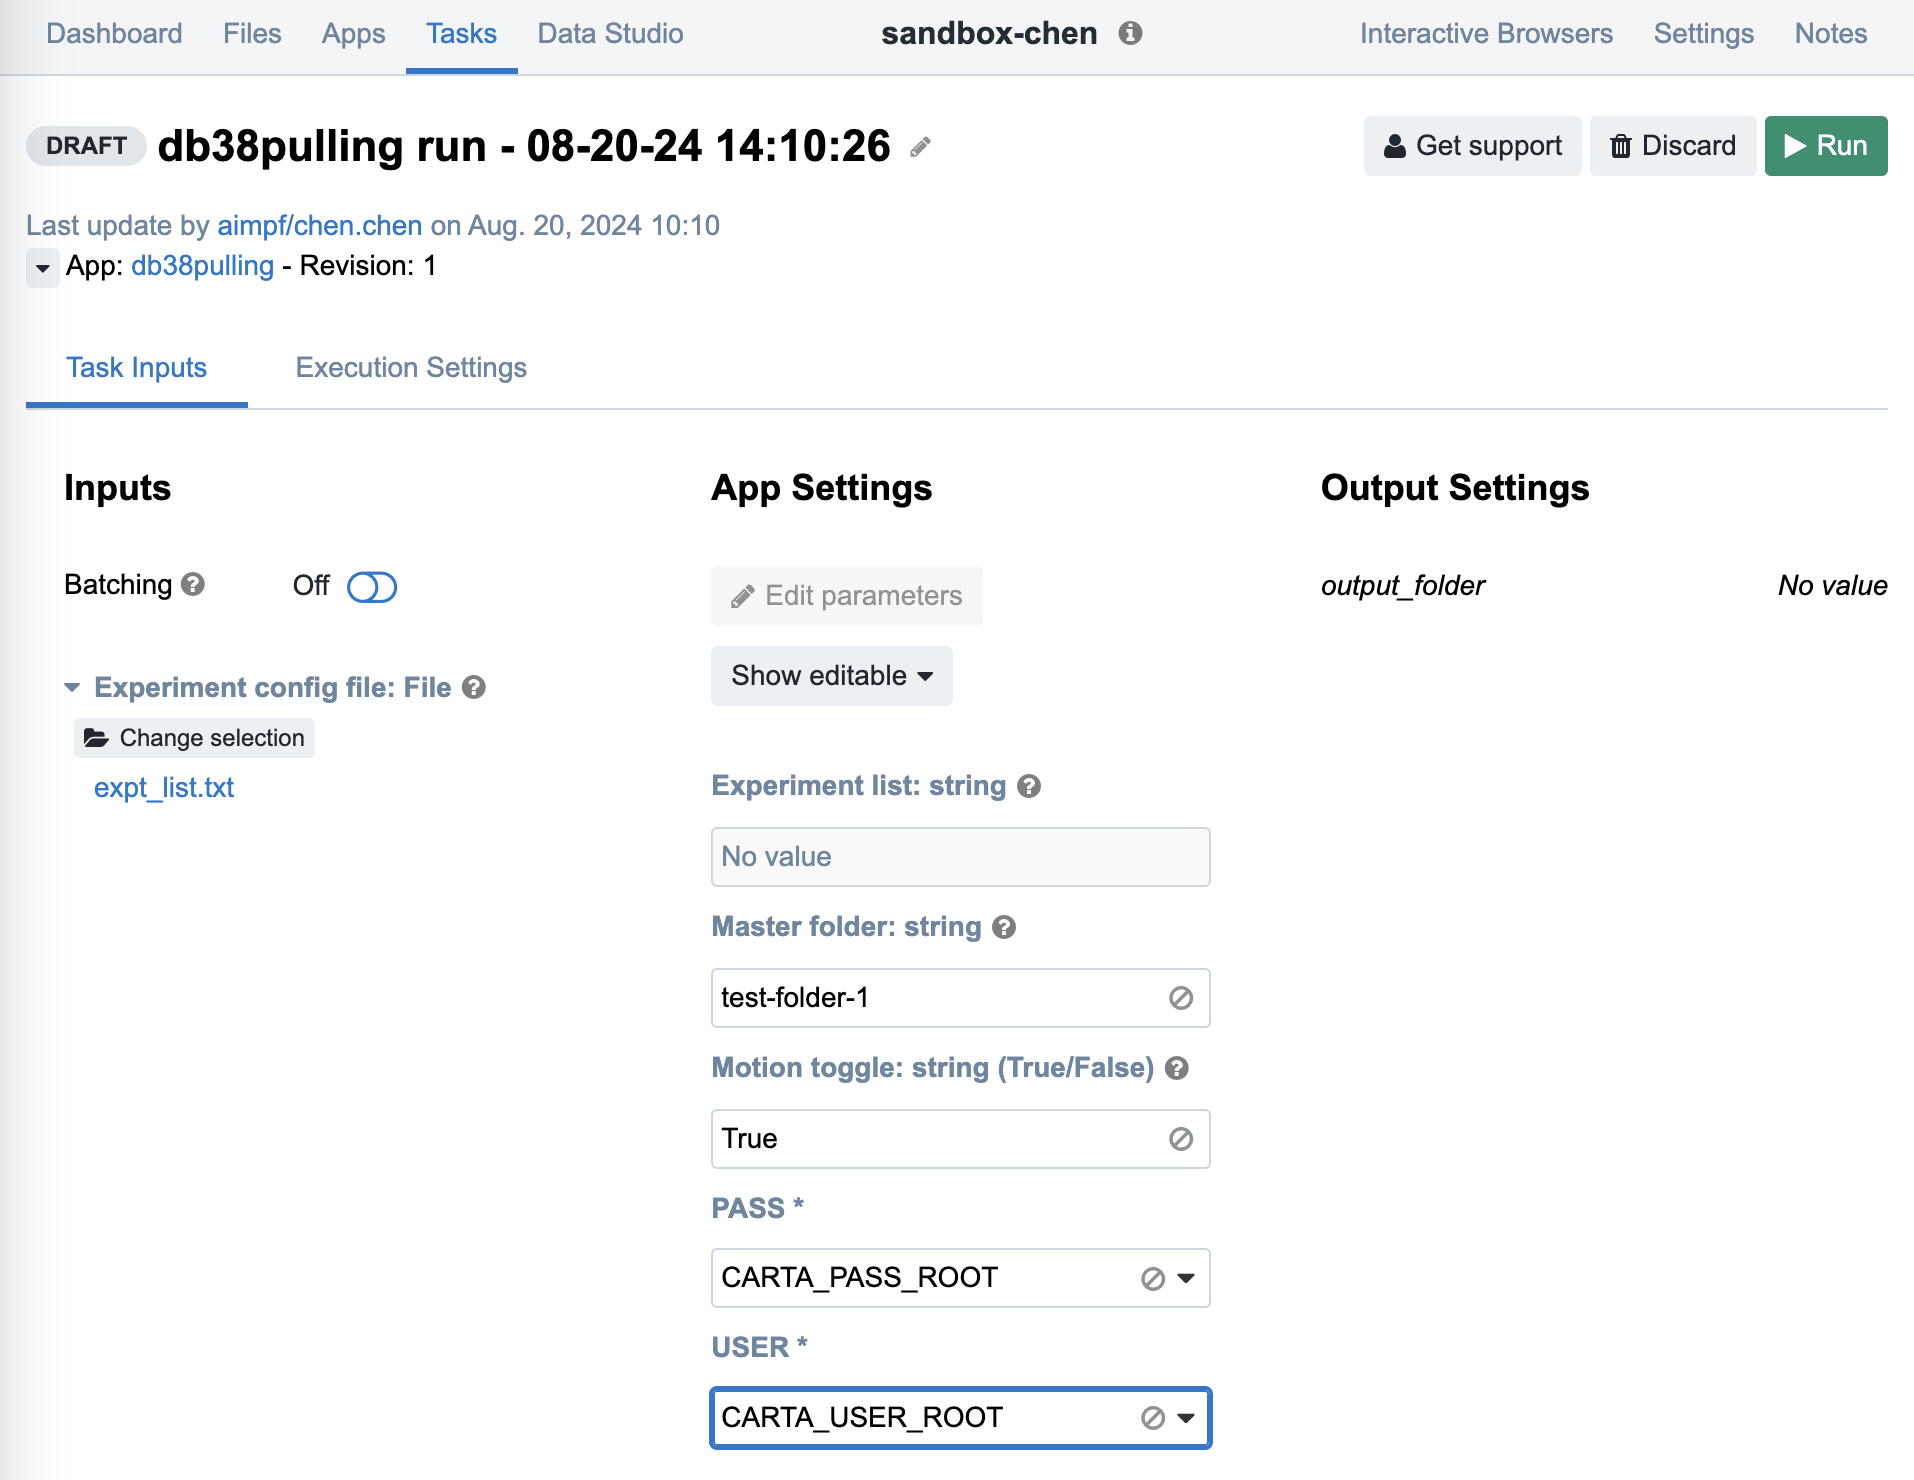
In the
Task Inputtab, you will see three columns:Inputs,App Settings, andOutput Settings. Use the input file selector for theexperiment_fileinput port.USERandPASSare dropdown lists, while text fields are provided forexperiment_list,master_folder, andmotion_toggleinput ports. Fill in the required values.
Note
Leave experiment_list empty, as the CLI enforces a mutual-exclusivity rule between experiment_list and experiment_file, allowing you to submit either a comma-separated string or a text file listing experiment names.
Tip
The file selected in the experiment_file input port must be uploaded to the platform first. Upload the file in the Files tab via Add files, then select it in the experiment_file input port. Currently, the platform does not support direct text file creation.
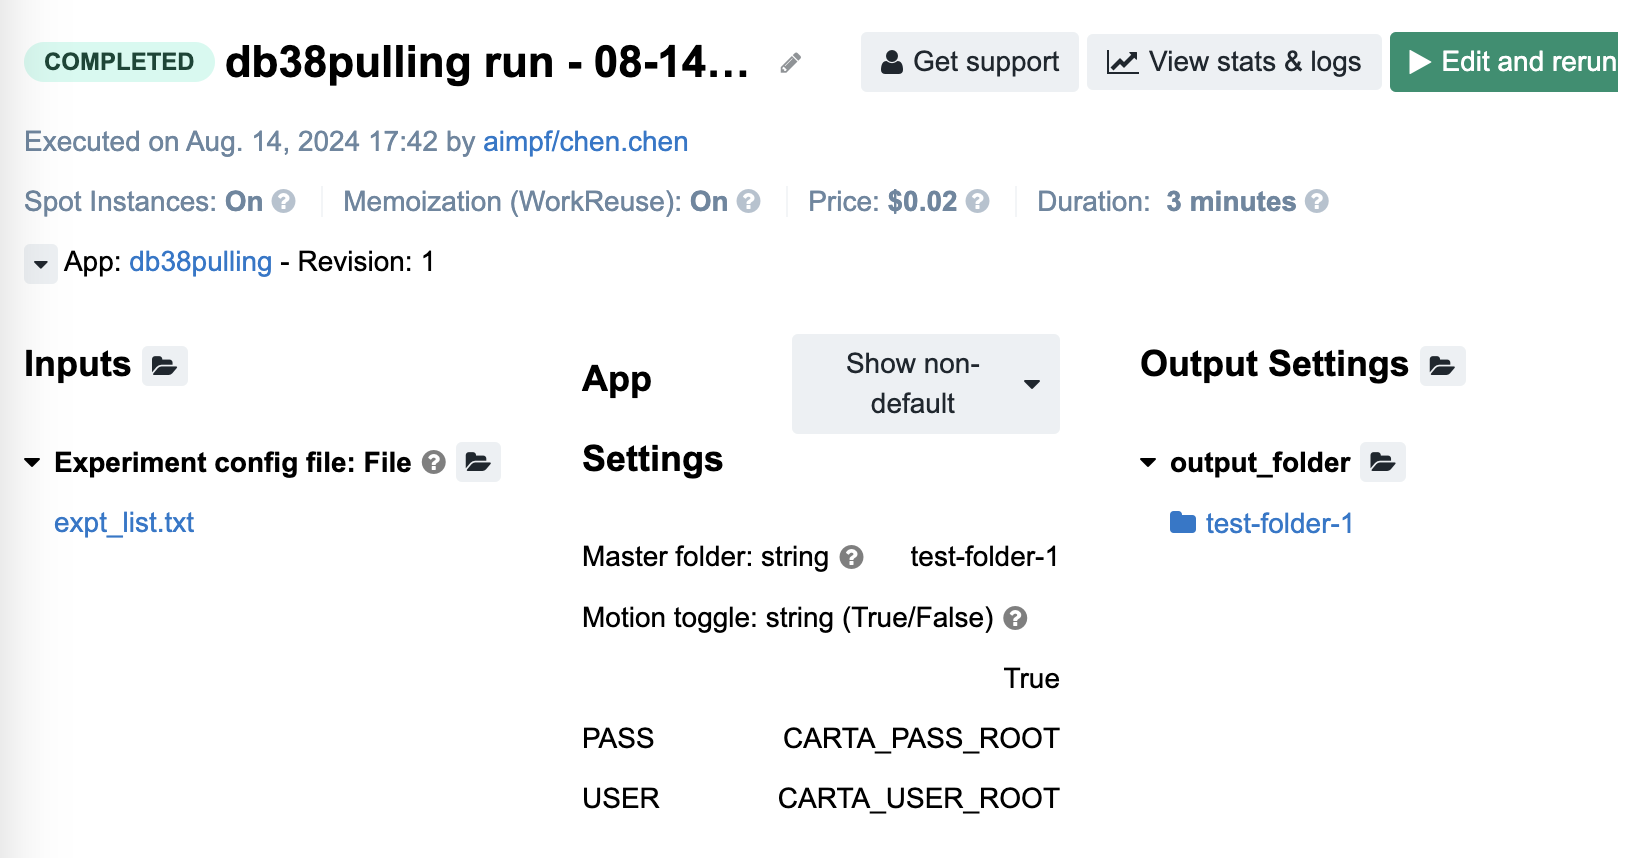
Click
Runin the top-right corner to start the task. You will be taken to theTaskstab to monitor progress. The status will change fromQueuedtoRunningtoCompletedif no errors occur. You will receive an email notification regardless of the job’s outcome.
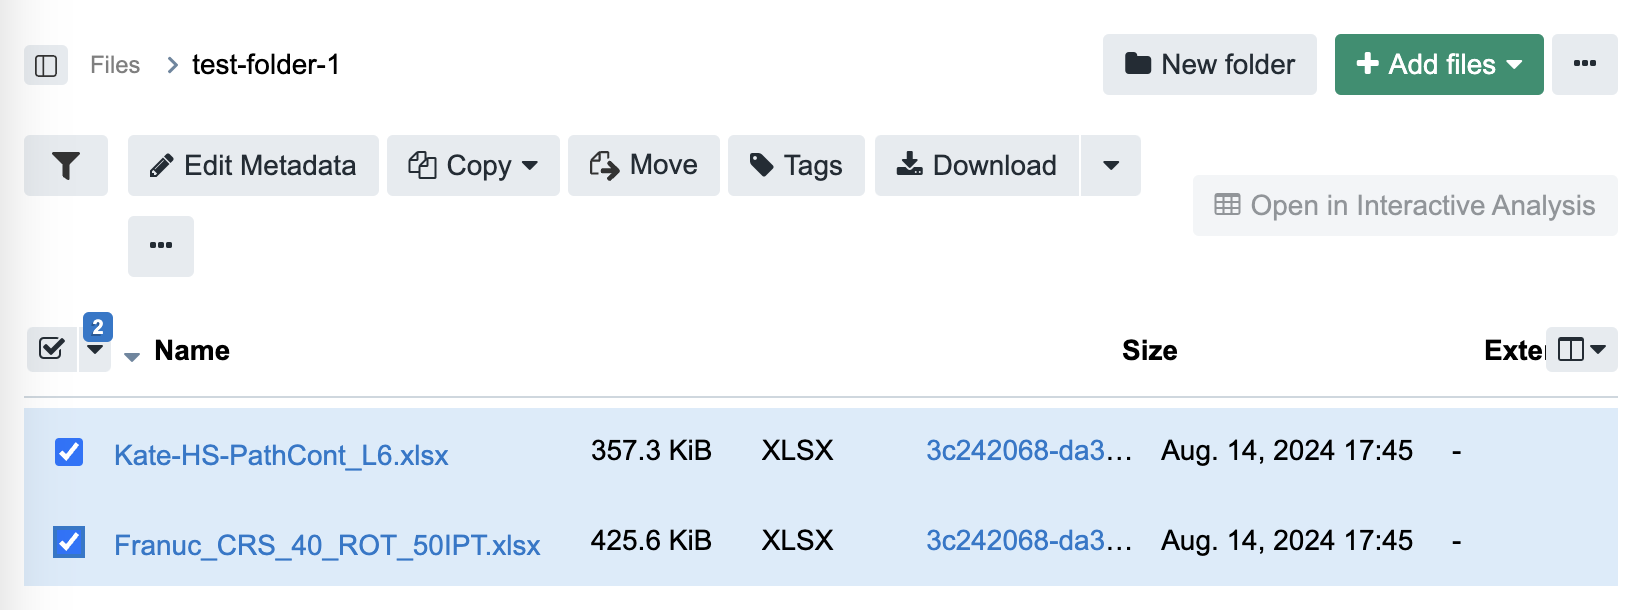
Access the results by clicking the folder name in the
Outputcolumn. The output folder contains individual Excel files for each experiment, which can be downloaded separately or as a zip file.
Note
When a file/folder with the same name already exists on the platform, it will not be overwritten. Instead, a new file/folder will be created with a name preceded by a pattern like _#_, e.g., test-folder-1 becomes _1_test-folder-1.
Summary
This guide outlines the steps to deploy a command-line tool on the Seven Bridges platform, using the example tool db38pulling to query the db38 database and generate Excel files.
Steps
Create the Tool:
Navigate to your project, select the
Appstab, and create a new command-line tool.Register the Docker image and configure the necessary input/output ports, arguments, and environment variables.
Configure Secrets:
Store sensitive information as secrets on the platform.
Add these secrets to the whitelist to allow the tool access.
Run the Tool:
Execute the tool from the
Appstab, set up inputs and outputs, and monitor the task in theTaskstab.Retrieve the results from the output folder, which contains individual Excel files.
Manage Results:
The platform prevents overwriting by renaming files/folders if duplicates exist.
This summary provides a streamlined overview of creating, configuring, and running a command-line tool on Seven Bridges.