Turning Your Code into a Seven Bridges Tool
This guide is heavily influenced by Python and is recommended for analysts and developers with some coding experience. It is available for users who have developed a specific code library that they wish to share easily with other users. For example, if you have written an application/command line tool that processes output files from equipment that you work with regularly. If you are unable to complete the steps after reviewing the troubleshooting section, reach out to your company’s Software Development team or customer.support@contextualize.us.com.
While comprehensive instructions are available through the Seven Bridges Knowledge Center, the following instructions are a condensed version highly specific to Contextualize and Contextualize customers.
PREREQUISITES
Seven Bridges username and password. (To obtain Seven Bridges credentials, reach out to your site lead or customer.support@contextualize.us.com)
Introductory Seven Bridges knowledge. While this guide aims to clearly define each step, there are frequent Contextualize-hosted trainings to gain familiarity with the system and various concepts such as creating your first Seven Bridges project.
Your own code library that you wish to share with others, preserve in its current state, or easily combine with other tools and workflows.
STEP-BY-STEP INSTRUCTIONS
Seven Bridges Tools are command line tools that run inside their own Docker container. The options and inputs provided by Tool users will be used to build the command line that shepherds data into the container, evokes the command, and manages the return of the results.
Confirm your code works as a command line tool.
Before uploading your code to Seven Bridges, confirm that any desired functionality works properly as a command line tool on your local system. As an example, the birdshot repository allows a user to construct and download (from Google Drive) a graph of the BIRDSHOT data/filesystem via the command line shown below. There are several other available commands in the birdshot repository, but this download command will be used as an example through the rest of this tutorial.

Dockerize your code
How to create a Docker Container is beyond the scope of this tutorial, but there are many, many resources, including on the Docker website itself. When in doubt, read the docs: Docker references (https://docs.docker.com/). An example Dockerfile for the birdshot repository is shown below.

Upload Dockerized code to Seven Bridges
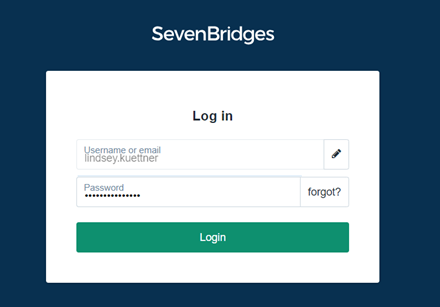
For this section, we will start in the Seven Bridges platform available at https://igor.sbgenomics.com/. Log in to Seven Bridges.
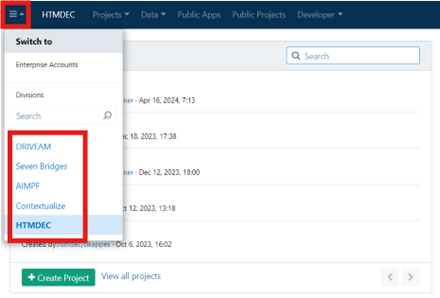
Once you are logged in, navigate to the appropriate division from the menu icon in the top left corner.
Select “Developer” then “Authentication Token”.

Copy the “Authentication Token” by clicking the clipboard to the right of the “Token” box. Note: Each division has a unique authentication token and the division selected in 2 will be the only division allowed to use this Docker image unless the image is public.

Return to your code’s command line and run:
docker login images.sbgenomics.com -u YOUR_SEVEN_BRIDGES_USERNAME -p AUTHENTICATION_TOKEN
Build the Docker image. Hint: by running the command below, replacing DIVISION with the division name selected in #2, NAME with your desired code name, and VERSION with the code version (such as major.minor.patch, or, to begin, 0.1.0), your container will more easily connect to the Seven Bridges container repo in later steps.
docker build -t images.sbgenomics.com/DIVISION/NAME.VERSION
Push the Docker image to Seven Bridges by running the below with the same image name used in #6.
docker push images.sbgenomics.com/DIVISION/NAME.VERSION
Confirm your Docker image was properly uploaded by navigating to “Developer” and “Docker registry”. You should see your image name under “Registry name”.

Note: Privacy settings can be changed via the gear icon under “Actions”.

Note: There are other ways to upload a repository, outlined in the Seven Bridges Knowledge Center.
Create a Tool
Once your code is available on Seven Bridges, you can create a reusable tool.
Navigate to your desired project by selecting “Projects” and your project name. Note: If you have not yet created a project, select the green “+ Create a project” button to create your project.

Once in your desired project, select “Apps” and “Create app”.

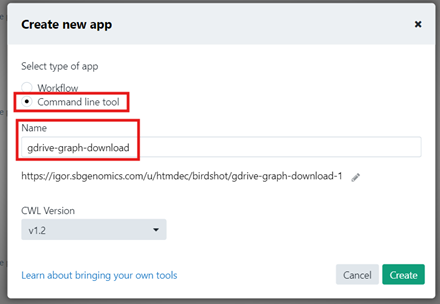
Change the “Select type of app” button to “Command line tool”, give your tool a helpful name, and select “Create”. Note: Use the default URL and “CWL Version”.
This takes you to the “Visual Editor” mode of the newly created tool. On this page, you will build out the command line described in the first section “Confirm your code works as a command line tool”. Note: You can see the command line that will be executed at the bottom of the “Visual Editor” screen. This text should closely match what was developed in the first section.
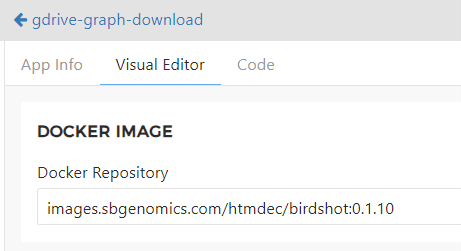
Docker Image: Enter your image name that was created in section 2, “Upload Dockerized code to Seven Bridges”: images.sbgenomics.com/DIVISION/NAME.VERSION
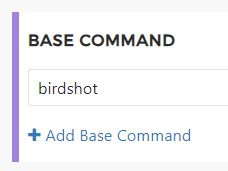
Base Command: This section will be in lieu of a Docker ENTRYPOINT as described above. If you did not specify an ENTRYPOINT, enter the base command here. If you did specify an ENTRYPOINT, that will always be the first item in the command line by default and is not changeable unless you upload a new Docker image or version.
Input Ports: While “Arguments” is listed next in Seven Bridges, we will come back to that. “Input Ports” is used for anything that can be specified in the command line by the user. “Input Ports” section includes any usernames/passwords (Secrets), files, strings, or integers a user may need to specify. In the birdshot graph example, the user need only enter their username and password.
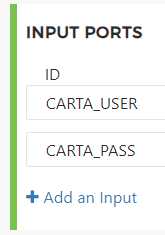
Double-clicking on an Input Port will open an options panel on the right side of the screen. There are settings for type, whether the input is optional or required, and whether this input should be included as-is in the command line or is used in an “Argument” (described below).
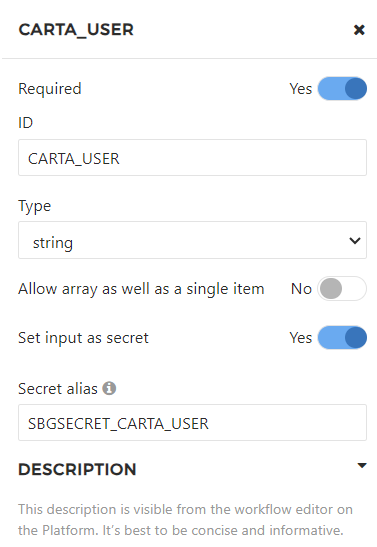
Note: The “Description” section is purely informational and will not affect the function of your tool but will help guide users and help you visualize the command line.
Note: The “Include in command line” toggle allows the user to specify the input, but it will be used in an argument and not directly in the command line as-is.
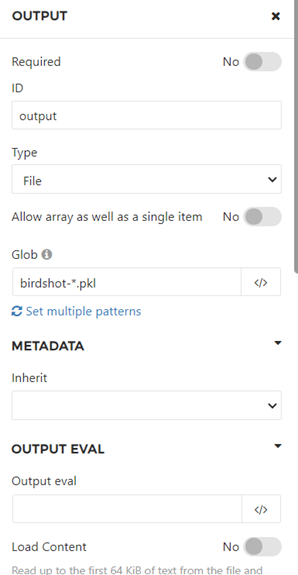
Output Ports: This section will include anything you want the tool to output, typically one-or-more files. Similar to the “Input Ports”, double-clicking on a port will open an options screen. The most important field here is “Glob”. Glob expansion will be compared to files generated by your code and any matching files will be exported out of the container before the run terminates. Unmatched files will be lost. You can be as restrictive here as you would like, or simply enter “*” and all files generated by your code will be captured. Note: For those familiar with POSIX pipes, Seven Bridges will not output a string or integer, so all outputs must be saved as a file.
Environment Variables: This is commonly used for tools that require username and password, API token, or other secret input. For more detailed instructions, see document “Storing and Using Secrets in Seven Bridges”.

Other: “Other” is used if you would like to capture the standard out. The resulting file is compared to the glob expansion pattern described above.
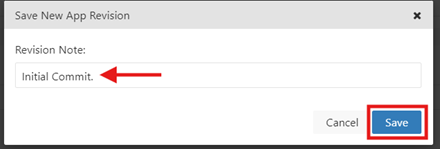
Select the floppy disk icon in the top right corner to save your tool. Enter any change notes as necessary and select “Save”. Hint: You may also select the play arrow icon to the right of the floppy disk which allows you to “Save and Run” the tool. However, this option does NOT allow for any Revision Notes, which are extremely helpful for documentation.

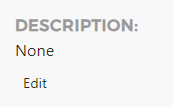
Note: The “App Info” tab in Tool Editor allows for extensive documentation taking, such as adding descriptions, authors, and other information. Simply hover next to the smaller text you wish to edit and you will see the word “Edit”. Click and type in the information you wish to include.
Run your Tool
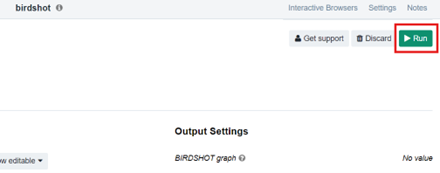
After adding Revision Notes and saving the tool, you will be on the “homepage” of the tool. From here, you can select the green “Run” button in the top right corner of the screen.

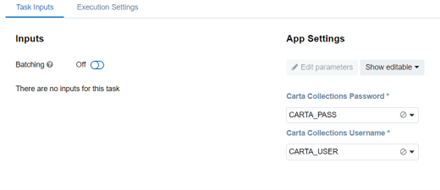
Under “Inputs” and “App Settings” enter any necessary information. You may again refer to the “Storing and Using Secrets in Seven Bridges” document if your tool uses Secrets. In the example below, no direct Input is required, only Secrets, which fall under “App Settings”.
Select “Run” in the top right corner.
TROUBLESHOOTING
No access to Seven Bridges (i.e., Cannot Login)
Confirm that you are entering your correct username and password and use the “forgot?” feature if necessary. If you still cannot access Seven Bridges, or do not have an account, please contact your site representative or customer.support@contextualize.us.com.
Project not Visible
If you cannot see a desired project, you may need to request access from the project admin. You will be automatically set as the administrator for any project you create.
If you need to create a project, select the green “+ Create a project” button to create your project.

If someone created a project that you would like access to, the project owner needs to login to Seven Bridges using their own credentials, navigate to the project, and select “Manage members” to invite you to the project.

My tool ran without error, but there was no output
This is likely due to an issue with your “Output Ports” setting. If you have no output port listed under “Output Ports”, no output will be saved, even if your code generates output files. If you do have an output port, the glob pattern must match the names of files you wish to save.